Having a Shooting Routine

Ever since my love affair with photography began, I’ve noticed the images from seasoned photographers had a uniform look and feeling to them. And I wanted to do the same with my images. I figured they had a system or a process of their own to achieve such a look. As a result of that thinking, I started developing a shooting routine to aid in capturing a consistent look to my images. “Shooting routine? What’s that? I define it as a checklist of things to do to help you see the image and think about how to capture it before you take the shot. Thing such as which body and lense to use, to shoot it landscape or portrait, how is your depth of field along with many others. After years of try, fail, learn and repeat; I’ve come to trust my routine. It has become something I do instinctively. I’d like to share it in action at my favorite place in Detroit, the conservatory on Belle isle.

I start my routine by walking from room to room, camera still tucked away, curiously seeking out subjects of interest. All the while keeping mental notes on what’s catching my eye. After I’ve made a complete lap of the conservatory, it’s time to get the camera out and revisit those areas of interest. As I approach my subject, I choose what lens I’m going to use and closely study it. Trying to sort out what is catching my eye and where are the edges of my shot. Next, I either stand or setup my tripod in the location where I want to create my image. As I Look through the viewfinder, I ask myself a series of questions.

  • Where do I want my subject?
  • Will it be a landscape or portrait shot?
  • How large or shallow do I want my depth of field?
  • Is there anything in the foreground and or background that would be distracting to the viewer eyes?
  • What’s in the light and what’s in shadow?

If I’m satisfied with my answers to my questions, I’ll then take the shot. After the exposure, I will review the shot to see if it matches the image in my mind’s eye. If not, I’ll ask myself “What must I do to match the shot in my head?” Do I need to get closer or farther away? Larger or smaller aperture? Or do I need to completely recompose the shot? After doing whatever necessary changes, I’ll reshoot and review. And will repeat this cycle until I feel I’ve captured the image I was looking for. Sometimes I’ll walk the route in reverse. For a different point of view. If I find something interesting, I’ll go through the same steps to capture the shot.

Shooting Routine_1

As I said earlier, I’ve come to trust and rely on my routine to capture images. It helps me shoot with intent and allows my creative eye to be my guide and not my impatience. It has also help me develop my sense of aesthetics and focused in on what has caught my attention. There are times where I cannot use my routine and I’m forced to improvise. For example, while doing my research on Antelope canyon, I found out the guided tour moves in one direction and you pass through it only once. And with the amount of money I spent on hotel, rental car and airfare, I wanted more than one chance to capture the fluid like sandstone and sharp contrasting desert light. So, I scheduled two tours to double my chances to shoot successfully. You can see the results of that adventure here, Antelope Canyon 2.0.

Something else that help me develop my shooting routine was when I lived in downtown Detroit. I had a habit of walking around the city with my headphones in and actively looking for images. I did it as often as I could and at every hour of the day. And during all four seasons including winter until it was too cold to walk around. I would pick out a certain area of the city and would crisscross the area searching for compelling subjects. I would frequently walk the same block, from every possible direction. Continuously taking notes on what’s in the light and shadows as well as what time of day it is. Was it going to be a morning, midday or afternoon shot? Would it be a wide or narrow field of view? And when I felt the time was right, I would head out with my camera and capture the shot I had found. I have very clear and fond memories of each of those images. During that time, I not only explored Detroit, I began to understand the importance of going and looking for a shots along with having a shooting routine. It took me years to develop it and I’m always willing to improve upon it. But it’s “My Routine” and it may not work well for you. It’s up to you to come up with or piece together a routine that works well with your style of shooting.

Shooting Routine_2

For me and my photography, having a shooting routine is a healthy practice to have. It has become an unconscious habit with a cadence that is unique to my shooting style. Stopping me from becoming impatient and helps focus my creative eye to capture more exciting images.

Until next time,

Steven

BE SURE TO CHECK OUT
Philosophy about Photography Part Six: Setting some personal goals

Setting some personal goals

If you follow my blog, you know I’m always stressing how important it is to know what it is your trying to show before you start shooting. This practice is called shooting with intent. You may ask yourself, “Why is that so important?” For me, it motivates ambition and sparks creativity. Along with allowing your creative eye to be your guide. To shoot with intent means you consider many factors before creating an image. Such as what camera and lense to use, where are the edges of your shot, what auto focus point to use, just to name a few. Putting thought into your photography and not hoping that you’ll “Get lucky” and somehow magically capture the images you want. For me, setting some goals for myself insures I shoot with intent. Let’s talk about goals and how to come up with some of your own.

The only wrong way to come up with goals is to not to have any. It could be as simple as looking for some interesting light or trying some different settings. When it comes to making goals for yourself, you want to state what it is you wish to accomplish, how long you’re giving yourself to do them and ideas on how to meet them. Keep in mind, you’re not writing an essay; simple one liners will do fine. You can keep them on your phone, in a notebook, on the back of a business card, somewhere to keep track of them. And bring them with you every time you venture out. I keep mine on my phone, so I know they’re always with me and I can add to and or edit them wherever I go.

It’s important to be realistic with yourself when making them and that they’re within reach of your skill set. Something that if you push yourself just a bit, you’ll be able to accomplish it. It’s a good idea to set deadlines for them as well. A day, a weekend, a month or a year. Some kind of time frame so you don’t get lazy and procrastinate. The idea is to challenge and expand your creativity, not to overload yourself. If you don’t meet your goals or a deadline passes you by, don’t be hard on yourself. Reset them and try again later. Just don’t give up on them. Follow the links below to see examples of my shooting with intent.

In each instance, I had a clear target to aim for. Some took me longer than others to check off my list, but they kept me focused and actively seeking the images I wanted. It also helped me rediscover my excitement about photography that had been slowly eroding away from doing the same unstimulating routine over and over again. Shooting with intent also help me define my growing style of photography. And after meeting each goal, I have a greater level of satisfaction and fulfillment with my photos. Because of that, I always have a list of ongoing goals to insure I’m shooting with purpose. Here are a few of them.

  • Finding a unique image
  • Interesting light and shadows
  • Sense of speed
  • Sense of aesthetics
  • Strong and interesting composition

Adding some type of goals to your routine can be a healthy challenge to motivate your drive and grow your creativity. Something to guide your creative journey through photography and to start to shoot with purpose. I hope this post shed some light on shooting with intent along with encouraged you to set some goals for you and your photography.

Stay safe and keep busy,

Steven

BE SURE TO CHECK OUT

Philosophy about Photography Part Seven: Choosing Light over Available Subjects

The Right Massage

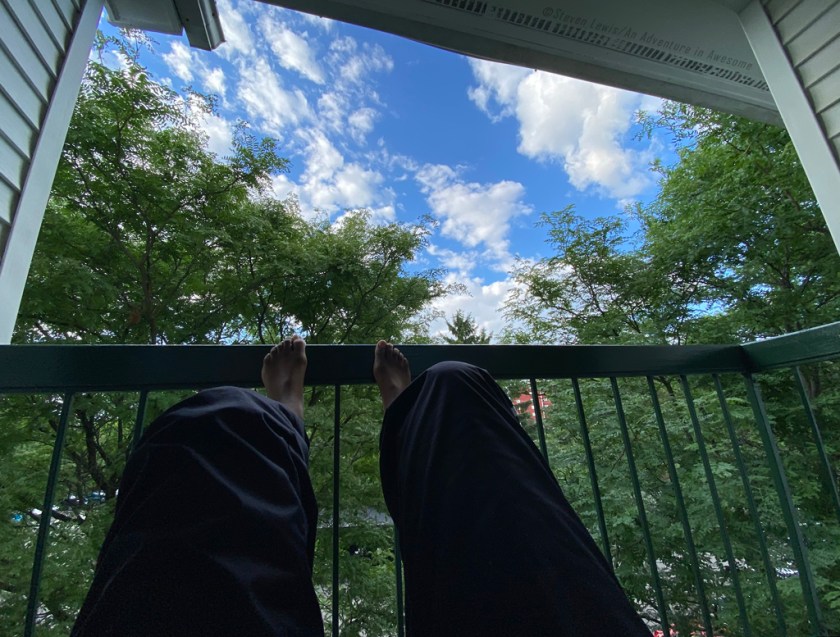
I feel it’s important to be aware of what message we are sharing on social media. We all watched spring come and go through our windows. Now summer is in full swing, the Force is strong with Mother Nature with her seductive call to venture out and enjoy the summer. Unfortunately, United States is now well over 8 million cases of COVID-19 and has over 223,00o deaths(as of Oct 23,2020) . And the last thing health care workers want to hear is “I saw my friends and family online at a cookout, party, weekend getaway and they were not wearing a mask or social distancing”. I’m not saying don’t go out. That’s your decision. But if you do, mask up, be safe and share those images of you doing so. Photos where no one is wearing masks and not practicing social distancing is misleading and could lead to an unhealthy or dangerous situation. I have a tiny following but know some of you who have hundreds if not thousands of followers. It’s too easy to send the wrong message to others in these uncertain times. Until there’s a working and readily available vaccine, we all must do everything we can to stay safe and healthy. If you’re struggling with  quarantine, check out this post, Bored and in Lockdown? How to keep yourself occupied.

IMG_6291
In my quarantine paradise

Mask up, stay safe and keep busy!

Steven

If you like what you see and read here, click the “Follow” and “Like” button. Along with feel free to leave a reply below.

Common mistakes made in Aviation Photography

I like to shine a spotlight on some common mistakes I’ve made in the pass along with countless others who love photographing aircraft. Mistakes if left unchecked, can turn into bad habits and poor processes. There are four common errors I want to discuss that deals with aviation photography, but the same infractions can be seen in other genres of photography as well.

The first is pure black shadows. The undersides of wings, tailplanes and anywhere that falls into shadow. If your image were shot in early morning or late afternoon, most likely your shadows will be extremely dark. It’s those images shot mid-day with shadows that are as dark as night that I want to address. Here’s the thing, shadows are darker tones not pure black. Don’t believe me, go outside and take a look. So, why does this happen? One of two reasons. Either it’s a result of poor exposure or bad post processing. You the photographer, should understand how your camera exposes an image and know how to properly adjust your settings to get the correct exposure. If you use Lightroom, Photoshop, Elements or whatever… You should have a good understanding on how to correct and adjust exposure in your software. I can’t stress this enough, Google and YouTube are your know it all friends. Take advantage and learn from them.

The freezing of propellers on aircraft and rotors on helicopters is the next issue. When you freeze the rotors on a helicopter or the prop on a plane, you end up with a very silly-looking image. As if they’re floating motionless about to fall out of the sky. It’s an easy mistake to make and can be challenging to overcome. It’s a result of having your shutter speed too fast. And it goes against that saying of having your shutter speed be at least your focal length. Meaning, if you’re shooting with a 400mm lens, your shutter speed should be at least 1/400th of a second. Even at 1/400th it’s just barely enough to blur a prop and will still freeze a main rotor. Here’s a technique that I’ve used with a fair degree of success. I’ll start shooting around 1/320th of a second and after each pass of an aircraft, I’ll lower my shutter speed. Shoot and chimp to see if it’s sharp. If it is, I’ll either go slower or stay where I’m at. And if the image is blurry and out of focus, I’ll crank up the shutter. Getting rotor blur on helicopters is much more difficult. They spin much slower than props. This means you’re going to need to lower the shutter speed even lower. I’m not going to try and make it sound easy. Because handholding and shooting a large telephoto lenses at slow shutter speeds is not. But with time and practice, you can and will find the shutter speed range you’re comfortable with.

Next, let’s discuss poor composition. Not talking about images of flying aircraft. Which is heavily influenced by what auto-focus point you have selected. I’m talking about images of aircraft on the ground. Placing your subject dead center of the frame is not only boring, but it’s also less appealing than a well-composed image. An overlooked aspect of composition is foreground and background. Having them cluttered or distracting can take attention away from your subject. I feel the biggest accomplice to poor composition is being in a hurry to “Get the shot” and not thinking about what’s visually interesting and how you want to show it.

Therefore, I feel every photographer should nurture their creative eye as much as possible along with develop some type of shooting routine. To understand what makes an image “Pop”, how to draw your viewers eye deeper into your image and to connect with them. It’s always good to have somewhat of an idea of what you want to shoot before heading out to an event. Just knowing what it is your trying to capture is a start to having a routine. And it’s part of mine. Once I’ve an idea of what I’m trying to capture, I then try to find the edges of the frame that is catching my eye. I then compose my image, shoot and review. If I’m not pleased with the way it turned out, I then recompose, shoot and review until I’m satisfied. There will be situations where you will not have enough time to go through your routine. But if you have one and you practice it enough. When the time comes, you’ll be ready and be able to quickly go through the motions of your routine to capture the moment.

Good Composition

Finally, is the poorly sorting of images you’re sharing. Showing 7-8 slightly different images of the same aircraft is a quick way to lose your viewers’ attention. If it’s your personal website, Facebook or Instagram. You should be able to find the best images of what it is that you want to share with your audience. Coming up with a sorting process will help you find the right images to show. Having some sort of process and the discipline to follow it is key. Here’s a link to my process that I’ve been using successfully for years, “The Pain of Sorting”.

With a better understanding of exposure, a newfound confidence in panning, some experience with composition along with knowing how to find the images that best express what you want to show, your photography will continue to grow.

Until next time,

Steven

if you like what you see and read here, click the “Follow” and “Like” button. Along with feel free to leave a reply below.